Saturday, July 13, 2024

April 8th's 'Smart' Total Solar Eclipse

This post comes about three months later than it should but, as they say, better late than never. I had an amazing trip to Hamilton, Texas to witness the total solar eclipse. I did my best to both capture the eclipse and to travel light. The photo is me with my Unistellar Odyssey Pro telescope and a DSLR camera at left.

Image of a man standing outside under a blue sky dotted with clouds. With him is a small telescope on a tripod and a DSLR camera on a tripod. 
 
The Odyssey Pro is Unistellar's newest 'smart' telescope. It's a small lightweight telescope, with a primary mirror just  3 1/3", but it takes super images. Last fall Unistellar improved their software to make solar observing much better but this was going to be the first time anyone had tried using a 'smart' telescope for observing a total solar eclipse. So how did it do? 

All-in-all, it did pretty well. 
image of a partially eclipsed Sun, with sunspots.

Thankfully, during the first half of the eclipse the weather was mostly cloudless. The telescope had no trouble finding, focusing (it has auto focus) and tracking on the Sun. But as the eclipse progressed and the Sun began to take on more of a crescent appearance the tracking wasn't very good and I had to manually correct the tracking to keep the Sun in view. 

Image the Sun being mostly eclipsed by the Moon so that it looks like a yellow crescent.

My biggest concern was totality. How would the telescope and its software handle seeing the Sun when the Sun didn't look like it normally does? Would the exposures be okay? Color was a big concern too. As I have mentioned before the color that the Unistellar telescopes and app give when imaging the Sun is artificial. The telescope's sensor sees farther into the infrared than our eyes do and that adds extra red to the image making the uncorrected image look sort of lavender in color. The app changes the color pallet to give the Sun a more pleasing yellow color. How would it look during totality?

Yellow. Very yellow.

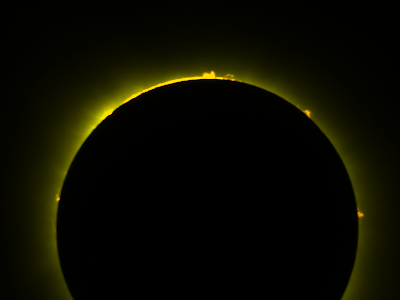
Image of a totally eclipsed Sun showing the inner corona and solar prominences. The view has a yellow cast to it.

Thankfully, this yellow color cast was easy to correct in Photoshop and I was able to get images like the two below. 

A color-corrected view of the totally eclipsed Sun showing a white inner corona and several red prominences.

A full-disc image of the totally eclipsed Sun showing rer prominences, especially at bottom and right.

Visually, the eclipse was amazing. Ethereal, even. The large red prominence seen at the bottom of the image above was very easy to see with unaided eyes and the corona was fantastic. 

There was no way for the Odyssey telescope to capture much of the Sun's corona as its field-of-view is far too small. That's why I brought my DSLR. 

Image of a totally eclipsed Sun showing the solar corona.

I have now seen two total solar eclipses and I don't really feel that any image can adequately capture the beauty of the corona, but I am happy with this image.

After totality, I was so euphoric that it was difficult to remember to keep taking images of the Sun to complete the time-lapse sequence I was shooting, but then the clouds rolled in and it no longer mattered. Still, I was happy to get the entire first half of the eclipse plus totality and that's all that mattered. 

I would rate the experience as a total success. Using a 'smart' telescope allowed me to travel with far less gear than most people who photographed the eclipse and I am happy with my results. The next total tolar eclipse isn't until 2026 and I am sure that by then the technology will be even better.

Saturday, February 10, 2024

Disco Sunspots!

 Back in October I posted about using a disco ball to observe a solar eclipse. It turns out that you can also use a disco ball to safely observe sunspots too. Here's how I did so earlier today.

Really all you need is a disco ball, a place to secure it in the sunlight and a shadowed area to project the image of the Sun. Here I have my disco ball sitting on a tripod for a Unistellar telescope. I aligned the disco ball so that it reflected an image of the Sun into my house and nearly 70 feet down a dark hallway on to a sheet of white paper. Here's the result:

It's not a great image, but you should notice a definite gray smudge-like area on the projected image of the Sun. That's a big sunspot that is visible on the Sun today. I also imaged the Sun with a Unistellar Odyssey Pro telescope and solar filter. I got this image which I rotated to match the orientation of the projected image above.

As you can see, that's the same sunspot group in both images. This is another confirmation that a disco ball is an excellent tool for safely observing the Sun.


Friday, November 10, 2023

Jupiter's Moons: Himalia, Elara and Pasiphae Too

It's no secret that I like to use my Unistellar telescopes to track down obscure things and to create animations of them moving in the sky. Back in August I managed to track down Saturn's faint moon Phoebe (on my blog here). 

Now that Jupiter is in opposition its time once again for me to take a look at it and some of its family of moons. The four Galilean moons are bright and easy to see with any optical magnification - even binoculars will work if you can hold them steady enough. 

Here's a shot of them taken in late October when Jupiter was also near enough to a background star that was almost as bright as one of the moons.

Jupiter has 96 (!) known natural satellites, but most people only ever see the four pictured above. Back in 2021 (when there were only 80 known moons of Jupiter) I first blogged about trying to extend my view to include Jupiter's moon Himalia. I found it, but wasn't very happy with my results, so I revisited finding that moon again last year (on my blog here) and now that I have just seen it again, I suppose that it has become an annual thing for me.

The animated gif below is from two images taken 58 minutes apart on 9 November 2023. Himalia can be seen moving pretty close to dead center and the glow of Jupiter is on the left. I circled it to make it easier to see.

That worked out pretty well. Well enough that I wondered if there were any other Jovian moons that I might be able to catch. 

Moons like Amalthea are bright enough, but far too close to the glare of Jupiter for me to ever be able to see. Some of them are just too small and faint, but Elara is just bright enough and far enough from Jupiter for me to be able to photograph it with my 4.5" telescope.

Elara and Himalia are in the same group (the Himalia group) of Jovian irregular satellites. With a diameter of 105.6 miles Himalia is larger than tiny Elara, which is just 53 miles across. As you can see from the graphic above (which I created using the SkySafari app), Elara is a bit farther away from Jupiter. It takes 260 days (8 1/2 months!) for it to complete an orbit around Jupiter. Himalia orbits just a bit faster, swinging around Jupiter ever 251 days (That's still a long time.).

I was a little worried because I had some cirrus clouds in the way and SkySafari (by far my favorite astronomy app) doesn't always have the best coordinates for these faint irregular moons. I pointed my telescope at the position listed and saw this:

There's a moving object in the lower right corner which at first I thought was Jupiter's satellite Elara. It was only later (after I put up an earlier version of this post) that I realized that I hadn't checked to see if there were any known asteroids in the area. Sure enough, that's the asteroid known as (933) Moultona.

Well, rats. What I needed was more accurate coordinates. Thankfully, JPL's Horizons System is an easy resource for getting accurate coordinates for small solar system objects.

I pointed my 4.5" telescope at the right place and gave it another shot. Was I able to spot a moon that's just 53 miles across from a distance of over 376 million miles?  Yes, though the glare from Jupiter was far worse than it was for Himalia (and strangely red too).

It's pretty tough to spot in the full frame, so I have posted a cropped animated gif version with Elara in a circle.

According to JPL's Horizons System Elara has an apparent magnitude of 16.625, just over half a magnitude fainter than what SkySafari listed. There's one other irregular satellite of Jupiter that is near to that magnitude: Pasiphae, with a magnitude of 16.877, it's only a bit fainter than Elara. With a diameter of 36 miles it is smaller but, thankfully, it is also farther away from the glare of Jupiter. In fact it is a lot farther from Jupiter. 

Here it is: 

Pasiphae has a retrograde orbit (meaning it orbits backward relative to the orbits of all of Jupiter's regular moons) that takes 764 days to complete. Yes, it takes just over two Earth years to circle Jupiter! Since Pasiphae and even Elara and Himalia take so very long to circle Jupiter, what we are seeing here isn't much of any of their orbital motions. Instead, most of their motion in the sky is because Earth itself is a moving object. During the hour or sow between images Earth moved much more in its orbit around the Sun than Jupiter and its family of moons did, allowing them to be seen against the much further background stars.

Friday, October 20, 2023

Solar Eclipse!

On October 14, 2023 along a line from Oregon through Texas there was an annular eclipse. The rest of the continental U.S. got to see a nice partial solar eclipse. 

I observed the partial eclipse along with about 50 others at Palomar College where I teach astronomy.

The eclipse crowd at Palomar College (that's my shadow in front)

As you can see from the photo above we had perfect weather and the eclipse did not disappoint. 

Here's a photo taken when the Moon had maximum coverage over the Sun from our vantage point:

Image captured using a Unistellar eQuinox 2 telescope

Thanks to the dedication of Palomar student Tomas Chester we were able to capture a time-lapse video of the entire event. Here's what it looked like: 

About two weeks before the eclipse I learned of a very cool outreach tool that helps to make eclipse viewing safe and fun - a disco ball. (See the paper: Why every observatory needs a disco ball). I immediately purchased a disco ball and set it up on the day of the event.

Above left is a standard disco ball. Each of the mirrors acts like a pinhole camera and reflects an image of the sun. The image on the right shows many images of the partially eclipsed Sun projected by the disco ball during the eclipse. It was very popular with our crowd and gave an almost magical view of the event. I highly recommend using a disco ball for every eclipse outreach event.

This eclipse was sort of a preview for an even better one - a total solar eclipse that will take place on April 8, 2024. Weather permitting it will be visible along a path from Mexico, up through central Texas and up toward the northeast U.S. and into Canada. I plan on observing that one and I will bring my disco ball with me.

Saturday, September 23, 2023

Here Comes the Sun

The most viewed post on my blog from last year was Observing the Sun with an eVscope. Everything about that post is now completely out of date thanks to some recent and exciting updates from Unistellar with the new release of version 2.5 of their app.

What's in version 2.5? The ability to have one of their telescopes to automatically find and guide on the Sun. Of course, to observe the Sun you need a safe solar filter that goes on the front end the telescope. 

a telescope with a solar filter on it

Above is my eVscope 2 outfitted with the new solar filter available from Unistellar. 

The new version of the app includes the Sun in the catalog (see below), though it strangely describes it as a planet. When you choose the Sun it will remind you that you need to have a solar filter in place before pointing the telescope at the Sun. Pointing at the Sun without having a filter on it will ruin your telescope.

a screen grab from the Unistellar app

Pointing at the Sun is automatic, unlike previously where the telescope had to be manually pointed by looking at the shadow of the telescope. Once the telescope is pointed at the Sun it now automatically tracks on the Sun, which is also a major improvement, as the old version had no tracking. That made focusing very difficult as the Sun was always drifting across the field of view. Now, focusing is much easier, especially with the Sun having so many sunspots.

So how does it look?

image of the Sun showing sunspots
Image of the Sun taken September 23, 2023

Great! Unistellar seems to be applying a color shift to the image to give it a pleasing look. Images taken prior to the app update made the Sun look very un-Sun like (see image below taken last year). I used to always convert them to grayscale because I couldn't stand the color. 

image of the Sun


Also, I suspect that the Unistellar app is now applying a sharpening routine to the images of the Sun when you save them, but that's okay, as they look great. 

All of this is perfect timing as there is a solar eclipse happening in 3 weeks, another one in April and solar maximum is just around the corner! Expect to see more solar image posted here soon.

Sunday, August 6, 2023

Saturn With Five Moons

The Unistellar telescopes are not exactly known for being great telescopes for imaging planets. But that's okay, as they deliver much better images of deep sky objects. But there are times when you want to look at the planets. Thankfully, last fall they implemented a software update that greatly improves planetary imaging for Venus, Mars, Jupiter & Saturn (see my post A Harvest of Planets for more). 

Last night I used my eVscope to look at Saturn:

The view isn't quite the same as what you get in a traditional telescope. When you look through a normal telescope you can see Saturn, its rings and its brightest moons too. But here the view is optimized to show just the planet, so the moons sort of drop out of view. 

If instead you point the telescope at Saturn's brightest moon, Titan, then the view is completely different. 

The optimization used for planets is no longer in place and you can use Enhanced Vision to see farinter objects. I intentionally didn't center things here, but the big bright thing is Saturn, which is completely over exposed. Also visible are many stars and some of Saturn's gazillion moons. How do you tell the moons from the stars? Consulting an app like SkySafari helps, but a surefire way to find them is to photograph them again to see what moves. 

The animated gif below is cropped a bit from the image above. It was made from two images taken 22 minutes apart that were then aligned on the stars. Everything that is moving is part of the Saturn system.


I've got an annotated version below, but can you spot all five of them? Two of them are close to the glare of Saturn itself. Titan is just to the upper right of Saturn and Rhea is in the seven o'clock position, looking here like it is touching Saturn. Along that same line (Titan-Saturn-Rhea), but much fainter and further out is Hyperion. It is basically in the middle of the image. Extend that line further and you come to the much brighter Iapetus. The left of Iapetus is a star of similar brightness and a much brighter star below that. In between those two stars is faint Phoebe. SkySafari plots Phoebe in the wrong location but lists its magnitude at 16.8. 

Finding Phoebe was my main goal here. The best time to catch it is when Saturn is closest to Earth, which it will be later this month. Phoebe is a small (132 miles across) irregular moon in that it isn't completely round. It is far enough from Saturn (8 million miles!) that it takes 550 days (one and a half years!) to make a full orbit around Saturn. 

Here's the annotated version of Saturn and its moons. It's full sized so that you can actually spot Phoebe:

I am happy to have tracked down another faint moon of the outer Solar System.


Saturday, July 29, 2023

On Top of the World - A Visit to Mauna Kea

Earlier this year I was one of 18 educators selected for 2023 to be in the NASA/SETI Institute Astronomy Activation Ambassadors program. It focuses on teaching hands-on methods for teaching about multi-wavelength and especially infrared astronomy. Along the way we've had lots of training which included an online course to complete, a bunch of Zoom meetings and lots of emails. All of this culminated in an intense week of curriculum training and a visit to the Mauna Kea Observatories, specifically to get a first-hand look at NASA's Infrared Telescope Facility (IRTF). 

I'm not going to focus on the curriculum training here (that's for my students to experience), but instead on the visit to Mauna Kea Observatory. I've been to Mauna Kea before (and blogged about it here!), but it was many years ago and this visit offered so much more. I made this return trip with great reverence and a profound appreciation for what this special place means both to the Hawaiian people and the world of astronomy.  

That's me on Mauna Kea with the domes for the Subaru (left) and Keck Telescopes in the background.

After first spending time at the headquarters for the Gemini Observatory and the Institute for Astronomy in Hilo we prepared for our visits to the observatories by spending time at Hale Pohaku, the astronomers quarters, at the 9,300 foot level of Mauna Kea. This allowed us not only to acclimate to the elevation, but to take in its breathtaking night sky. 

The Milky Was so brilliant that you didn't need to be dark adapted at all to see it. Here's a photo of it that I captured with my iPhone:

The summer Milky Way as seen from Hale Pohaku, Mauna Kea

The Milky Way and its spectacular dust clouds were beautiful. It is a shame that because of light pollution most people in the world never get to see it (even fewer see it from such an amazing site as this one!). Of special interest to me are the two stars near the bottom of the image.  The one on the left is Alpha Centauri, the famous Sun-like star that's just 4.3 light years from Earth. To its lower right is Beta Centauri, also known as Hadar, a blue giant star located 90 times further away. Both of these bright stars are too far south to see from my home in Southern California, so catching them was a special treat.

The next day we made a daytime visit to the summit and got our first close look at NASA's IRTF. Fun Fact: the IRTF was built to help support NASA's Voyager missions and made its first infrared observations of Jupiter just before Voyager's first flyby.

Here's the dome of the IRTF:

Behind the IRTF is the Pacific Ocean and the island of Maui. Inside is a 3.0-meter reflecting telescope:

The view above looks up to the telescope's secondary mirror. Most infrared telescopes have an undersized secondary mirror to avoid reflecting any of the heat of the telescope itself to the science instruments. 

When the telescope points at the astronomical object being studied infrared light reflects off of its primary mirror, to the secondary mirror and then down to the Cassegrain focus underneath the main mirror where one of the science instruments collects the light.

Science instruments in the IRTF's Cassegrain focus.
After our daytime visit we returned to the IRTF that night to sit in on some observing. The targets: debris disks around young stars where planetary systems are forming, then studies of the atmospheres of Saturn's moon Titan and Jupiter's volcanic moon Io. These were all studied using spectroscopy, which provides astronomers with a detailed look at the composition of objects.

We got to the telescope before sunset and what a sunset it was.

Mauna Kea sunset with the Keck telescopes.

Here's the open dome of the IRTF during the 'golden hour':

The view was spectacular looking across the mountain, away from the sunset:

From left to right that's the shadows of the IRTF, Keck I & II and the Subaru Telescope domes. Behind the shadows are the domes of the Canada France Hawai'i Telescope, Gemini North, the 2.2-meter University of Hawai'i telescope and the 3.8-meter United Kingdom Infrared Telescope (UKIRT). Note: the UK no longer operates UKIRT. 

Nature put on its own show after sunset as the Moon, Mars (left of the Moon) and Venus (just above the dome) were out in the western sky:

After it got dark and the scientific observations were underway at the IRTF I captured its dome against the starry backdrop of the summer Milky Way:

Looking the other way, the Keck Observatory was making use of its adaptive optics laser guide star:

While we were there the observing program using the laser guide star at Keck was headed up by Andrea Ghez, who won the 2020 Nobel Prize in Physics for her studies of the stars orbiting the supermassive black hole at the center of the Milky Way Galaxy. The observing here was a continuation of that research and we could see that the laser was indeed pointed toward the center of the Milky Way:

All-in-all it was an amazing night that culminated in our having some conversations with the astronomers who used IRTF. They needed to be focused on the work at hand while they were observing, so speaking with them afterwards was the way to go so as to not get in the way of their limited telescope time.

The next day we were given a daytime tour of the James Clerk Maxwell Telescope (JCMT). The Observatory is also on Facebook. Find it here.

The JCMT observes at wavelengths that are longer than infrared, but shorter than radio waves in the submillimeter part of the electromagnetic spectrum. As such, it looks a lot like a big radio dish antenna:

The JCMT is one of the telescopes that make up the Event Horizon Telescope that was used to produce the first image of a supermassive black hole (in the galaxy known as M87). It has also been used to detect phosphine in the atmosphere of Venus, which *may* suggest the possibility of bacterial life in its atmosphere (at very best its presence is unexplained).

Daniel Chase, me, project P.I. Dana Backman, Mark Lenfestey, and Vikini Santhanakrishnan underneath the JCMT. Photo by Callie Matulonis.
A big thank you to Callie Matulonis for giving us such a great tour that served as a wonderful capstone to an amazing week of astronomy that has had a huge impact on me personally and will carry over into my teaching in many ways.